
Logo to SVG: Detailed inspection case of graphic logo
After converting the logo to SVG, you should check the small text, white space, outline and color according to the actual size, and then use the editor to confirm that there is an editable path. The file can be scaled, but this does not mean that the text and thin lines in the blurred original image have been accurately restored.
What does this case illustrate?
This page uses the graphic logo PNG and SVG files provided by the user on 2026-10-19 to show how to check the existing results. PNG is 400 × 400 pixels, and SVG’s viewBox is 1000 × 1000; they are also the comparison materials for the homepage of this site.
This is a set of inspection cases with existing files, not the actual measurement that was re-converted by the queue of this site. It does not provide conclusions on conversion time, recognition accuracy or compression rate, nor does it consider the brands and fonts in the materials as the works of this site.
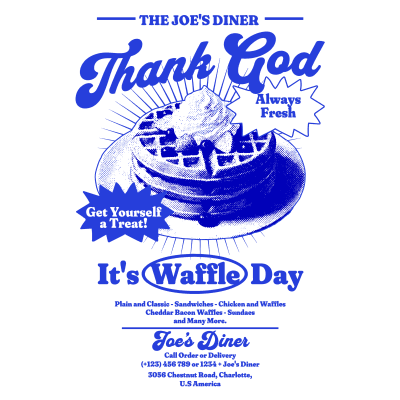 PNG original image 400 × 400
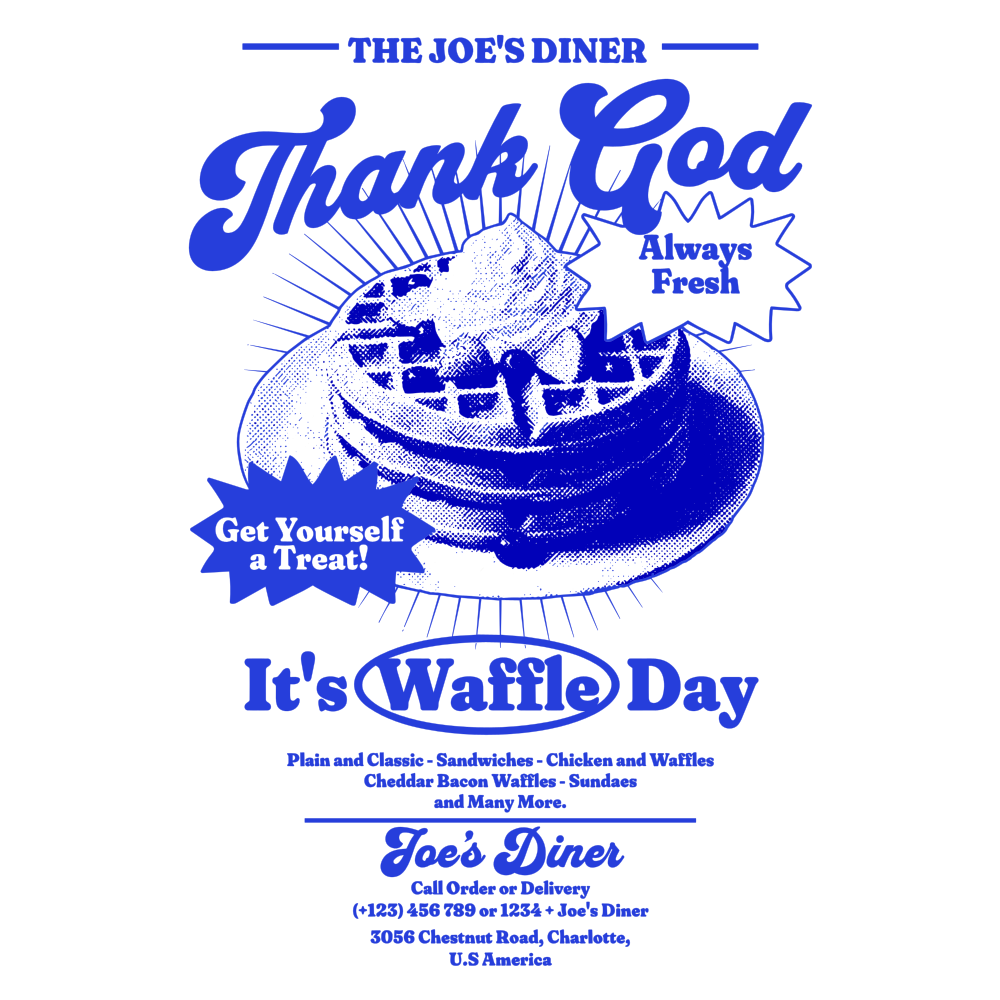 There is already an SVG comparison file
What original image is more suitable for logo vectorization?
Give priority to finding design source files; if there are only bitmaps, choose the version that has not been repeatedly compressed, has a complete body and clear edges. PNG avoids JPEG compression again, but converting a blurry JPG to PNG won't get the detail back.
This example has large characters, small characters, and dense patterns, which is suitable for explaining the inspection sequence. First check whether the outline is complete, then look at the font shape and white space; don’t judge the entire picture just by the smoothness of the title.
How to compare original image and SVG?
First compare under the same display size, and then enlarge the parts separately. The original image pixel size and the SVG coordinate range are different concepts. A larger viewBox does not mean that more original information is restored.
Small text and dense textures in patterns require special inspection. The result is suitable for the current purpose only if it is still legible at the actual target size and the outline meets the requirements.
- Contours: Check sharp corners, arcs and thin lines for breaks or sticking.
- Text: compare word by word, pay special attention to the inner holes and stroke gaps of small characters; pathed text does not mean that the font can be entered.
- Blank space: Make sure that the inner holes of letters and pattern hollows are not filled.
- Color and transparency: Change to white or black background to observe light-colored fragments; the preview background color does not belong to the file content.
What else should be done before printing or printing?
First check the path and fill in software that supports SVG and clean up the background and debris if necessary. When the site editor deletes by color, it will affect all areas of the same color. Highlight and confirm before deleting.
Have the producer confirm their receiving format, minimum line width and color requirements before delivery. This site provides SVG and does not equate SVG with AI, EPS or production files that have completed pre-press color correction.
- Keep a backup of the original SVG and then edit the copy.
- Export from the editor after modification; the original download of the task page does not contain editing modifications.
- Check the small characters and lines according to the actual printing size, and accept it by the producer.
SVG format basis and reference materials
SVG can contain both vector shapes, images, and text. Therefore, a file name ending in .svg does not alone prove that the original image has been converted to an editable path.W3C SVG 2 Specification: SVG Graphics Objectdescribes these object types.
The above information is used to describe the file format. The upload restrictions, membership requirements, results saving and editing capabilities of this site are subject to the page description and actual functions.